facebook
  • Project Sewing Vault
    • Sewing Courses
    • Link List and NEWSLETTER SIGNUP
    • My Sewing Shop's Blog
  • About Me
  • Bra-Making Blog
    • Sew Your Own!
    • Never Sewn Before? Start Here!
    • How to wear your bra
    • Bra Making Fabrics
    • Measuring for Bras
    • Wire Fitting
    • Wire Alterations
    • Fitting Bands
    • Band Alterations
    • Fitting Cups
    • Cup Alterations
    • Sloper Manipulations
    • Sew Alongs
    • History of Bras
    • A Day in the Life
    • Gallery
    • The Process of a Custom Bra
      • The Process of a Custom Bra
      • Why Have Custom Bras?
      • Wire Fitting
      • The Fitting Band
      • Drafting for Volume
      • Creating a Sloper
      • Pattern Design
      • Sewing a Bra
      • How to wear your bra
  • Learn to Sew
The Eve:
Why this pattern is
Revolutionary to
Bra Making

Bras by Kristen

Explaining the process of bra drafting for potential clients or drafting students.


This January, I am honored to be participating in Porcelynne's Live Draft Along as an instructor. Access is already open at courses.porcelynne.com/course/january-2021-live-draft-along/ 

There will be Facebook Lives in a private group (link accessed in the course platform above) and then the videos will be moved over to the above link for forever access. 

Also, I'm offering fit sessions for the students attending the January Draft Along event available at my own course site, https://sewingbycarolyn.vipmembervault.com/


If you are interested in going the route of sewing bras, there is a process recommended to get started. This post used to be a comment that I'd throw on forum questions and was too long (it was getting out of hand), and I am shortening it by breaking into topics on my blog, covering all the same posts I used to, from many well known makers.  In each of the topics listed below, you'll find many links and as I find new things, they will be added to the topics. This post can be viewed as a sort of table of contents.

Before sewing, I highly recommend fabric kits from the designer whose pattern you are using until you are more familiar with the process and what kind of fabrics are suitable.
https://brasbykristen.blogspot.com/search/label/Fabrics

[1] Wire needs to be the right width from sternum to armpit.[2] The band needs to fit around the body, tight to the sternum in the center front first (independently from cup volume) [3] cups need to be correct volume/shape for YOUR particular anatomy. RTW expects you to fit in the average wire for the average volume for the average band circumference... Which fits almost no one the way it's supposed to... I wrote more about that here...
https://brasbykristen.blogspot.com/p/why-have-custom-bras.html

There’s some great articles out there on the proper way to put the bra on and adequately test it’s volume. Make sure when you get to the step of checking your cups for fit, you know that you have scooped the “girls” into the cups properly.
https://brasbykristen.blogspot.com/search/label/Proper%20Bra%20Wearing

This fitting process can be done to any pattern, and here is a perfect example of this process being applied to the Chloe Pattern by BraMakery’s Natasha, shown by Liz of Youtube's LizSews Channel.

[1] How a wire should fit.
This measurement is taken by Bra-makers either with a flexible ruler or with different sizes of underwires until one properly fits the infra mammary crease. If you find underwires uncomfortable or poking you, more than likely they are the wrong size for your anatomy. Warning: Slight nudity in some of these tutorials.
https://brasbykristen.blogspot.com/search/label/Wire%20Fitting


Wires can be altered to fit. Most people can find some sort of wire shape out there that will work, but some absolutely cannot find one that is shaped properly for the shape of their root. https://brasbykristen.blogspot.com/search/label/Wire%20Alterations


[2] How a band should fit
A Band should be fitted independent from cups. We always tell people starting fresh to bra sewing to make a band with no cups and get that to fit correctly, first. Center against sternum with no breast tissue behind. See picture at end of post with the frame on a mannequin.  There are many posts on this subject, including one that I did with extra seam allowances for being able to alter easily. https://brasbykristen.blogspot.com/search/label/Fitting%20Bands

Once you’ve tried on the fitting band, take note of the alterations that need to be done and stitch them into the fitting band.
https://brasbykristen.blogspot.com/search/label/Band%20Alterations


[3] Then make cups
Start by making the cup size that the pattern designer recommends, because each designer will have their own chart in mind about what measurements make up what name in their sizing system. https://brasbykristen.blogspot.com/search/label/Fitting%20Cups

https://brasbykristen.blogspot.com/search/label/Cup%20Alterations


One more thing, I highly recommend the Eve Pattern if you’re interested in doing some designing, or if you’ve not had any successes with patterns in the past.  The Eve Classic Pattern is as close to a custom draft as is possible in Patterns. Also, if you somehow don’t fit in this range of patterns (which has more than 1000 options for custom sizing) Information can be found here for learning to draft bras from scratch here. https://brasbykristen.blogspot.com/p/the-eve-revolutionary-to-bramaking.html
In my bra making journey, I tried (and failed miserably) at some patterns that were not my size in an era (more than 10 years ago) where the patterns mostly matched the traditional American sizing of ABCD and then you were usually told to go up in band size to get a bigger cup. I made between 10-15 bras that didn't fit and I didn't know enough about the order of alterations and how to fit bras to make them work.

About 2-3 years ago, I started to go back over my bra making information and books, and I discovered that the internet has become a GAME CHANGER for the home sewist who knows nothing about fitting. 


My curiosity led me to The Bra Making Forum which is a group on facebook hosted by a small business, known as The BraMakery (formerly ArteCraft).  The group has 14,550 members (to date) from all over the world.  Natasha, who owns and operates the BraMakery, is one of the most well read people I have encountered on the subject.  I have learned so much about bra theory and the process of fitting an existing pattern from her group.  She has recently released a pattern of her own called The Chloe, which is featured in this video below by Liz of the popular YouTube channel LizSews. 


The process that is recommended over and over to new sewists is to start by doing a breast root trace, known as a Wire Fitting, then making a fitting band and doing band alterations, then making fitting cups and doing cup alterations.  Liz makes a beautiful demonstration of this process and how to apply it to the Chloe pattern.
 
I cut fabric for the fitting band in A Client's Fitting Band - Part 1.  I show assembly in A Client's Fitting Band - Part 2.  Then I cut and sewed tester cups in Test Cups for A Client.  Here's my summary of how the fitting went.

Recap

With my client measuring at a rather extreme torso shape, I was concerned that her measurements may have needed shaping to the back in a downward hike like I highlighted in this post about band alterations, based on previous work that I have done for this client in shaping her back darts in her clothing.  Therefore, I had created a "seam allowance" along the strap attachment point on her back band in case this alteration was necessary.  I was almost hoping it was necessary, however, the band  was successful exactly as the pattern was created. I'm a little disappointed that I can't show that alteration this time around. 

Seam allowances facing outside the band for comfort of the client and for ease of manipulating in the fitting for being able to pin. 


Inside of the fitting band, nice and smooth to the skin.


Fitting band on the hanger. 


My client measured as cup #2 in the cups offered in the 34 wire size.  So I made cups 1, 2, and 3 to have options for fit.


I started with cup #2 basted into the frame and pinned the straps on, because I wanted to be able to  move the straps easily for this client.  Strap attachment points can affect whether or not the straps dig into the muscle structure of the shoulders and if bra straps dig in a certain area of the shoulder it can create migraines (ask me how I know! This is why I don't care for X straps in the back.) 


The Fitting Summary

When she tried on the bra, there was only a little extra in the cup.  I probably could only pinch 1/4 inch of too much space in the cup.  In a much larger size, I would not have thought of trying a smaller cup, but in this case, I knew that the differences between the sizes could not have been more than 1/4 inch from cutting it out and handling the patterns. In a client of this size, 1/4 inch elastic stretches in the sewing just enough that it dents in the breast tissue along the neckline edge.  Because every underwired bra she has had seems to dig into her ribs/sternum, we have decided on a foam cup bra and the underwire channel being on top of the foam (an idea I have seen in ready to wear bras that I have altered). 

I cut fabric for the fitting band in A Client's Fitting Band - Part 1.  I show assembly in A Client's Fitting Band - Part 2.  Then I cut and sewed tester cups in Test Cups for A Client.  Here's my summary of how the fitting went.

My client measured as a cup #2 in a Regular 34 Porcelynne wire in a 28 band with a torso shape of V6. So, to have a few sizes to try like you would shopping in a store, I made cup # 1, 2, & 3. The frustrating store experience of band sizes that are different numbers to try to find the right sister size that will fit is basically eliminated with this fitting band and basting in cups way of trying on bras. Cup #2 was a little big for my client and cup #1 fit perfectly. No alterations  were needed for this client, I just moved down a cup size and it worked out. Below I have pictures of the assembly process. 

The Assembly 

1. I always mark front, apex, base of the vertical seam, and front. It's too easy to mess it up otherwise. (As my bra friend Dale says, "Ask me how I know." )


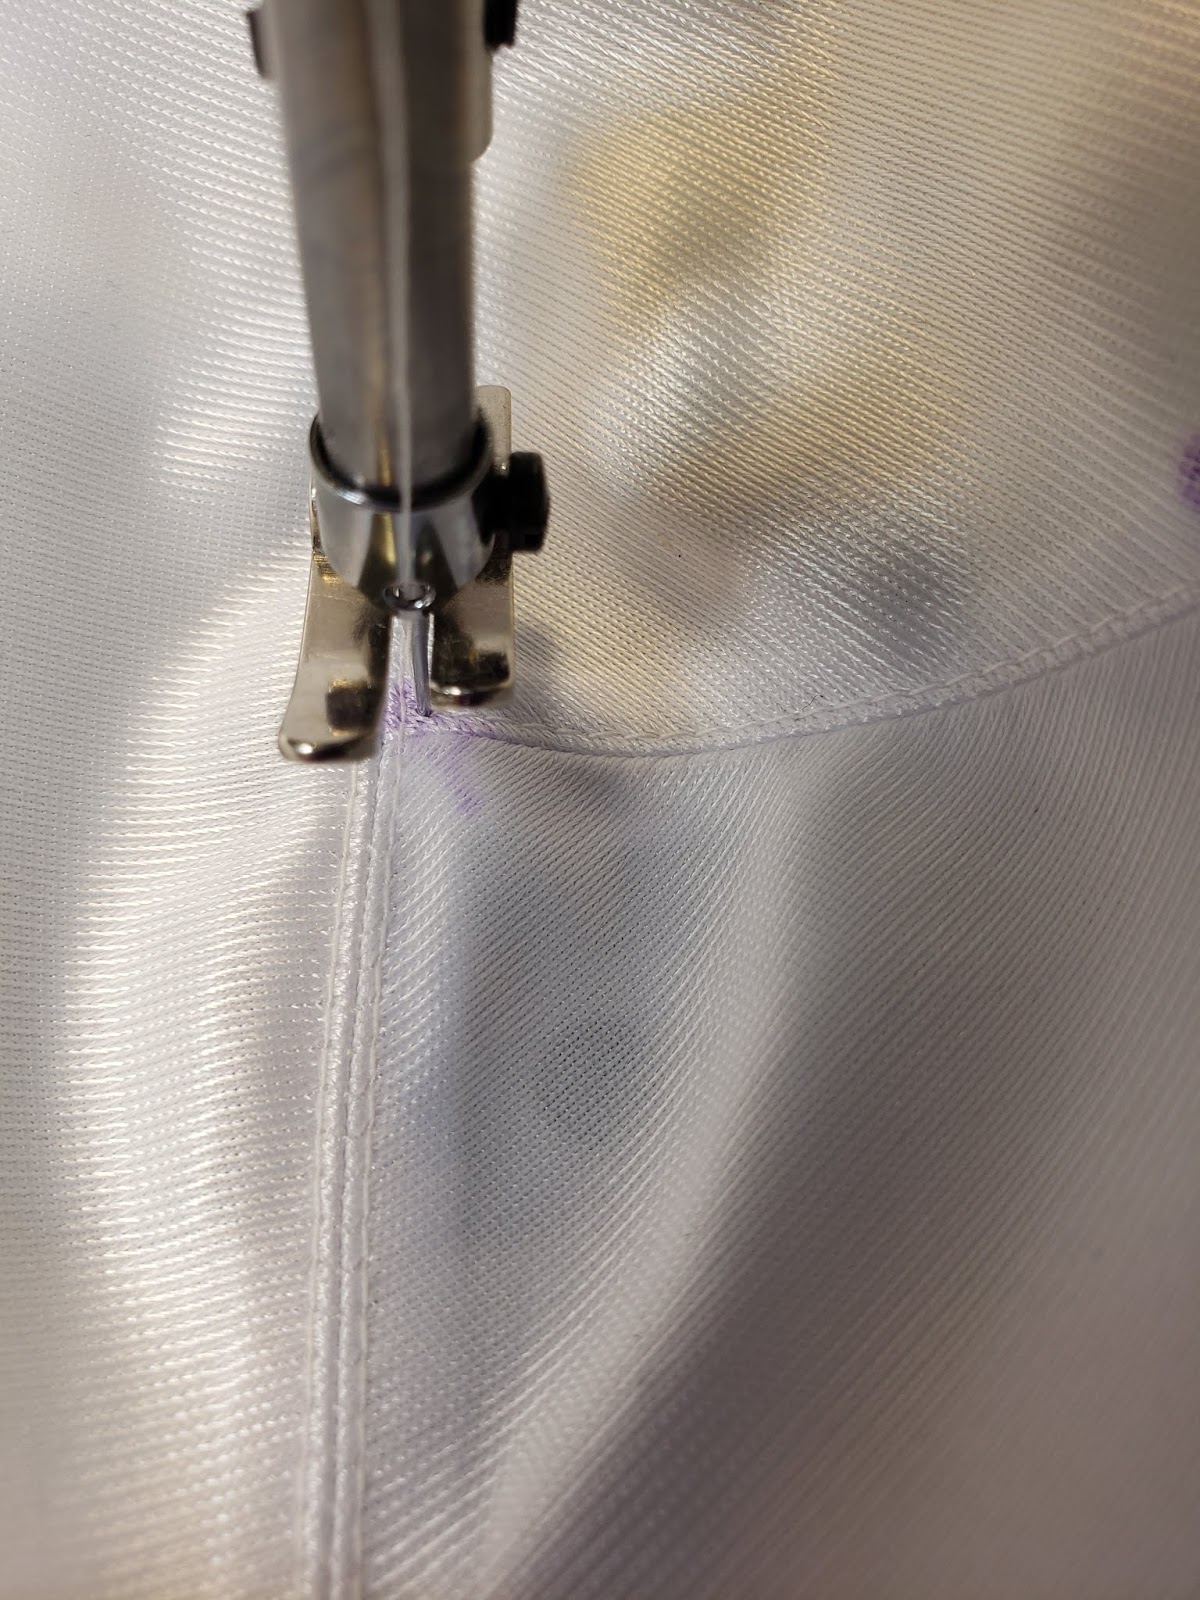
3. I stitched the vertical seam of the lower cup. I don't recommend back stitches at the apex because it can cause the fabric to have a bump that shows through shirts. The goal is to hide the nipple, not make it stand out.


I recommend to hold the tail of thread and lightly pull at the back to keep your fabric from getting sucked down into the machine.  (Some machines are more prone to this than others and if your fabric gets sucked down often, then I would start at the base of the cup and start up 1/4 inch, stitch up to the apex, turn and stitch back down to the base and back stitch at the base to reinforce the area you skipped to get started.)


I got to the end and put my needle down and pivoted... 


... and stitched the other direction exactly on the first line of stitching so the seam could still be pressed open. 


4. I pressed the seam open. It helps sink the stitches into the fabric and then I don't have to fight with the seam when I topstitch.


5. When lining up the upper cup to the lower cup, I match the seam allowances, not the corners. (see the purple line on the cup.)


6. There's a scant amount more of the lower cup almost visible by the rippling in this first picture. 


I slightly stretched the cup, so it evenly distributes the wrinkles and put a pin at the apex so the fullness is spread evenly. 


7. I stitched the cups together. I always place whichever side of the cups has more fullness to the feed dogs to ease it together. 


Also, I put some slight pressure while stitching, but not too much... Just enough to make the fullness disappear again. 


I pivoted around and sewed back the other direction, very carefully to match the stitches so it could be pressed open. 


8. I pressed the seams open. 


9. I topstitched 1 - 2 mm from the seam to flatten this seam as much as possible. 


I pivoted, moved to the other side of the seam, and topstitched the other side at that same 1 - 2 mm from the seam.


At this point, I topstitched up the vertical seam. 


I turned and topstitched the seam allowance from the horizontal seam just below the horizontal seam's top stitching. 


10. I applied elastics to the neckline and armhole areas of the cup because I'm making these cups to be used with generic adjustable fitting bands in my shop, so I'm building my inventory of cup sizes.  This could be skipped for most cups in the testing process. 

I started with an extra 1/4 inch of elastic hanging off the end because once you turn it inward to the cup, it is at an angle and if I don't lead with a little extra, then it won't go to the end of the cup and won't be caught in the seam allowance. 


I started at the side cup so it would be covered by the neckline elastic when it gets turned. 


Once I was most of the way sewn, I clipped the elastic off at the neckline seam allowance so it's not super bulky when the neckline gets turned over. (see purple indicating the seam allowance at the end of the elastic)


I turned it to the inside, and it's still too long where my thumb is, but not by as much as it first seemed like when I started on the outside. Also, you can see how I stopped at the seam allowance at the strap point. 


Here's how it looked after topstitching. 


Again, I left 1/4 inch extra for the first pass to allow for the angles once it gets turned. 


Once it is turned to the inside, almost the whole 1/4 inch of lead space is needed for topstitching the elastic to the inside. 


After I completed the second pass, that is when I cut the elastic at the center front of the cup. 


I then trimmed the tail of the neckline elastic at the strap attachment area by sliding my scissors in behind the scallops of the armhole elastics to get a clean line right at the edge. If I were putting this cup in a finished bra, I would bartack the strap on at this point to look like most of the ready-to-wear bras that I have worked on in our alterations shop


End Results

The completed cup, ready to be basted into the fitting band. 


Older Posts

Project Sewing Vault

  • Sewing Courses
  • My Shop's Blog
  • Link List and Newsletter Signup

HELLO, THERE!


Hello, There!

Welcome! There's nothing quite like the self esteem boost of moving into a well-fitting bra. Click the links above and hopefully you'll find something you didn't know previously about custom bras.


Find More


Translate

Bra-Making Blog Post Labels

  • Sew Along
  • Wire Fitting
  • Fitting Bands
  • A Day in the Life
  • Band Alterations
  • Never Sewn Before? Start Here!
  • Proper Bra Wearing
  • Fitting Cups
  • Cup Alterations
  • Measuring for Bras
  • Wire Alterations
  • Fabrics
  • History of Bras
  • Sloper Manipulations

Bra-Making Blog Posts Archive by Date

  • ►  2020 (42)
    • ►  February (22)
    • ►  March (19)
    • ►  December (1)
  • ►  2021 (8)
    • ►  January (6)
    • ►  February (2)
  • ▼  2022 (1)
    • ▼  January (1)
      • tutorials and blog posts from around the internet

Sponsor

Ko-fi is a platform for supporting artists for their work but is different from Patreon in that you don't have to do a monthly subscription if you don't want to. For anyone interested in donating for the efforts here and in our drafting forum on Facebook, you may arrange payment through Ko-fi.

https://ko-fi.com/brasbykristen


Pageviews past week

Created with by beautytemplates