facebook
  • Project Sewing Vault
    • Sewing Courses
    • Link List and NEWSLETTER SIGNUP
    • My Sewing Shop's Blog
  • About Me
  • Bra-Making Blog
    • Sew Your Own!
    • Never Sewn Before? Start Here!
    • How to wear your bra
    • Bra Making Fabrics
    • Measuring for Bras
    • Wire Fitting
    • Wire Alterations
    • Fitting Bands
    • Band Alterations
    • Fitting Cups
    • Cup Alterations
    • Sloper Manipulations
    • Sew Alongs
    • History of Bras
    • A Day in the Life
    • Gallery
    • The Process of a Custom Bra
      • The Process of a Custom Bra
      • Why Have Custom Bras?
      • Wire Fitting
      • The Fitting Band
      • Drafting for Volume
      • Creating a Sloper
      • Pattern Design
      • Sewing a Bra
      • How to wear your bra
  • Learn to Sew
The Eve:
Why this pattern is
Revolutionary to
Bra Making

Bras by Kristen

Explaining the process of bra drafting for potential clients or drafting students.

I measured a client of mine for the Eve Classic (which I wrote about here) and she measures for a torso shape that is very skinny in the underbust and has a 6 inch difference between underbust and high/over bust (chest above the bust). Therefore, she needs a band with a "V6" torso shape modification. For more on torso shapes, read this post.  She has little to no body fat, so bras can easily be uncomfortable based on pressure against her ribs and sternum. 

I cut fabric for the fitting band in A Client's Fitting Band - Part 1.  I show assembly in A Client's Fitting Band - Part 2.  Then I cut and sewed tester cups in Test Cups for A Client.  Here's my summary of how the fitting went.

Cutting for fitting


I cut this band out to be able to customize based on every possibility. 


Note the extra inch of seam allowance added to the center front and the side seam for customization. The center front is designed to be cut on the fold, so the seam would go where you see the edge of the paper (1 inch seam allowance). The side seam has 1/4 inch seam allowances so adding an inch will give a seam allowance of 1 1/4 inches. In my next post about preparing to sew, I have actually marked all the stitch lines and written on the seam allowance amounts. 

I have done the back band a little differently than I have seen them done in the past. 


First, the side seam has an extra inch so now the seam allowance is 1 1/4 inches. Second, I have split the back band to add the ability to fit for a band alteration called by some as the "downward hike." I wrote about the downward hike in this post, but essentially it's just like the back dart in garments. Some people have athletic shoulder blades or a very curved small of the back or a dowager's hump and in those cases, a downward hike can give shaping to the back if that is also needed. I suspect this client may need this kind of shaping, but I wouldn't always cut this way for every client. 


Part 2


I started these testers for our shop last year in January. Life happened and I didn't get them finished before the bridal season took off last year. Today I was able to complete them in time for this year's season. So many people think they can go without a bra in their formal dresses. We end up sewing in the fronts of a bra so there's a "shelf" to set the "girls" on and adding boning and a waist belt of grosgrain ribbon like corsets have to provide "stud walls" to hold up the "shelf. "

The Sloper

In garment sewing, you can buy many different patterns that are already made with a style to them, different necklines, different sleeve shapes, different lengths -- the sky is the limit where fashion is concerned. Once you've sewn for a while, a common pattern to have is a basic sloper, fitted to your own measurements that you can draw style lines on and manipulate into new patterns.  A sloper in any garment sewing is a design sheet to make new designs on that will fit you because it's based on your fitted pattern. A quick google search will show millions of slopers for garments.


However, a search for the same in bras shows different bra patterns with design already in them or this sort of idea from early bras. (Source:https://www.pattern-making.com/draft-bra-pattern/)


The information for drafting modern bras has been something where you still have to pursue elusive drafting courses and scour the internet for information, and buy expensive text books on the subject.  Even then, drafting books often say to draw a line at a certain measurement without explaining why you get that number, so if you want to draft for someone who is a 30A or someone who is a 40H, it doesn't really show you how to change that number.

Bra slopers function the same way as garment slopers and are based on your draft volume bra or your eve pattern.  If you are lucky enough to fit into the Eve Classic pattern, you get to skip straight to the fun of sloper manipulation to make whatever seam lines you might be inspired by in Ready to Wear. If you do draft from scratch, the sloper is the light at the end of the tunnel to keep you persevering through to the end. 

 You might brainstorm on a sheet like this. 


Then, when it comes time to make it in your size, this template is designed to skip the trial and error of drafting and skip straight to designing interesting new seamlines.  The Bare Essentials Method walks through taking your fitted pattern and drawing in these template lines and removing the curves so you can place new style lines.


Obviously, this is a very flat representation of patterns that are very round. What is unique about this method of slopers is the Bare Essentials calculations for how much curve is added to the lines in each of these locations on the sloper star grid. The curves added in the drafting process are recalculated by mathematical formulas to get designs that fit without much tweaking. In all the calculations Jennifer has worked on to automate this process, she has even put together a calculator for the sloper that gives recommendations for your new designs when you put in the results from your volume test draft bra. Soon, she will be featuring a sloper class on her website.

The process of getting to a sloper takes a while, but once we have reached a fitting draft volume bra, we know the designs based on the sloper will magically fit, so subsequent bras are not starting over at the beginning.
Here's a few of the basic alterations listed in the Eve Classic pattern (used with permission).  

https://porcelynne.com/womens-patterns/?referrer=CNWR_51041580484060


These alterations are applicable to other patterns, though, if you have a pattern you're trying to alter to fit. If you remember the different torso shapes like this image from SizeCharter, torso shape affects the cup fit also. 

If you are shaped like the Hourglass, or Inverted Triangle, you may need more space in your neckline area. While is you're more like the Pear, Rectangle or Round body shapes, then you may need to pinch out space in the neckline. 


These images below feature various alterations that one might need. Some of them address assymetry. 


Another common alteration is to move the apex.  This is something you'd do if the bra (or your body) is causing your nipples to point outward in what bra makers call  an "east/west facing" direction. 

When you've created a fitting band and you're ready to test out cups, then you stitch them together and sew them into the fitting band. The following images are from directions for the Eve Classic bra cup pattern, used with permission.  These instructions are for assembling the whole bra, so there is a couple steps I'd leave out for a fitting cup that are featured in these diagrams.   You can use this same principle of making fitting cups (or test cups) with any pattern to achieve the best fit. Once you've added the cups, you can move on to assessing fit and making pattern changes. 


First, If you're using the Eve Classic pattern, stitch together the lower cup.  

The pattern instructions have you press the seam open and top stitch with a seam tape.  This is a great step for a finished bra, but not necessary for a test bra. Then, put elastic on the neckline edge and the armhole edge so you can baste it into your fitting band for fitting.

I wouldn't waste expensive, fancy elastic on this step.  You could just use 1/4 inch elastic and straight stitch it on. If you're in a big hurry and want to make the cup construction more simple, you could skip this step, but then you'd want to off set the cup from the bridge by the amount of the seam allowance, and then do the same in the armpit area so that vertical seam attaches to the base of the fitting band in the proper location.


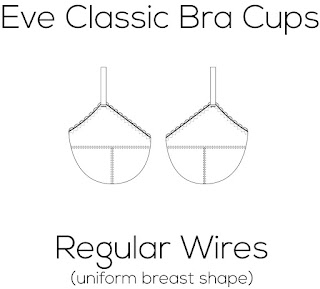
The images featured in this post are from the Eve Classic Band pattern, the regular wire edition (used with permission).  Please forgive the odd cropping, I'm writing from my phone today.  I would work on the alterations in order from the center front around to the back. 

The center front shouldn't be fighting breast tissue or gapping along the wire line. 


If they are, then you change the pattern by adding or removing from the pattern in the center front.

Once you have adjusted the bridge and you're happy with the center front, make sure the sides of the wire are still in an appropriate place at the underarm side.  If you find you need just one or two wires larger, you may be able to use them in this current fitting band.  Any more than that and I would make a whole new fitting band.


If the side seam is tight around the bottom band, but gapping along the top band, then the angle of the side seam needs to be changed on the pattern to accomodate the torso shaping.

One bra maker is athletic and found that her band was riding up strangely in the center back.  This is because her shoulder blades stuck away from her back due to muscle development, enough that she needed what bra maker's have referred to in the past as a downward hike.  She used press and seal on her body and drew on where it needed to go and used that "draping method" to alter her fitting band. 


Another reason someone may need the "downward hike" or a more curved back band than their measurements suggest, is if they have what is known as a Dowager's Hump or Kyphosis (Wikipedia article), pictured on the far right in this diagram.  This curvature of the spine isn't something that the calculator "sees" and the downward hike is for people who have more of a curve on the back. 


Asymmetry happens.  No one's body is perfect, but when all the RTW options are perfect, we feel "less than" because we can't find our shape out there.  The truth is, almost everyone is asymmetrical. I see it daily in our alterations business. One breast can sit higher on the body than the other, they can have totally different cup volumes and/or different wire sizes.  Make sure all the way around that the whole band fits in all these places before moving on to cups.

A band should fit properly around the ribcage, independently from cups. In the bra making community, we always tell people starting fresh to bra sewing to make a band with no cups and get that to fit correctly, first. You can do this process to any pattern you buy, but I highly recommend the Eve Classic band pattern, which is designed to go through this process. (Links at the end of the post) 

In this video, Jennifer demonstrates stitching the band into a fitting band. 


This one of the more well shared articles on fitting bands. It was the first writing I have seen on the subject and I've shared it with dozens of beginners. https://merckwaerdigh.wordpress.com/2014/08/08/step-7-sewing-the-fitting-band/


This page shows how the center front should tack along the center front at the sternum, tight to the body, with no breast tissue behind the wires. Jane shows excellent step by step sewing instructions.

https://janes-foundations.blogspot.com/2019/07/make-tester-band.html?m=1


Patterns for just the band, so you can complete this step in fitting:


Regular wire
https://porcelynne.com/patterns/womens-patterns/eve-classic-bra-band-for-regular-wire/?referrer=CNWR_51041580484060


Vertical wire (better for larger cups)
https://porcelynne.com/patterns/womens-patterns/eve-classic-bra-band-for-vertical-wire/?referrer=CNWR_51041580484060


There's also these variations to the basic patterns listed above:


Newer Posts
Older Posts

Project Sewing Vault

  • Sewing Courses
  • My Shop's Blog
  • Link List and Newsletter Signup

HELLO, THERE!


Hello, There!

Welcome! There's nothing quite like the self esteem boost of moving into a well-fitting bra. Click the links above and hopefully you'll find something you didn't know previously about custom bras.


Find More


Translate

Bra-Making Blog Post Labels

  • Sew Along
  • Wire Fitting
  • Fitting Bands
  • A Day in the Life
  • Band Alterations
  • Never Sewn Before? Start Here!
  • Proper Bra Wearing
  • Fitting Cups
  • Cup Alterations
  • Measuring for Bras
  • Wire Alterations
  • Fabrics
  • History of Bras
  • Sloper Manipulations

Bra-Making Blog Posts Archive by Date

  • ►  2020 (42)
    • ►  February (22)
    • ►  March (19)
    • ►  December (1)
  • ►  2021 (8)
    • ►  January (6)
    • ►  February (2)
  • ▼  2022 (1)
    • ▼  January (1)
      • tutorials and blog posts from around the internet

Sponsor

Ko-fi is a platform for supporting artists for their work but is different from Patreon in that you don't have to do a monthly subscription if you don't want to. For anyone interested in donating for the efforts here and in our drafting forum on Facebook, you may arrange payment through Ko-fi.

https://ko-fi.com/brasbykristen


Pageviews past week

Created with by beautytemplates